Showing posts with label raisins. Show all posts

Wednesday, June 16, 2010

Oatmeal raisin cookies

I've been on a bit of a library streak lately. Like a serious one. I'm talking about a once a week habit, my friends.

I'm not sure if it's because summer's here and there's not as much on TV, or if it's because I've been making more of an effort to read at lunch and before bed, but I've been plowing through the reads. Part of the reason for the weekly visits is because I've been using the OPL's Express Reads program, whereby you can take out a book for only one week, as opposed to the usual three. Express Reads are usually popular, in demand titles, so the library limits the amount of time you get with the book, meaning more folks can enjoy it. It's a good system, but also pretty stressful, because if you're late with your Express Read, you have to pay a hefty $2 a day fine. But the thought of that rapidly increasing tab also spurs on some pretty fanatical flipping of pages, which really can't be a bad thing.

A few weeks ago I happened upon the new Barefoot Contessa book on the old Express shelf. I usually tune into Ina Garten's show on the Food Network, partly for her tasty-looking recipes, but also for the cast of 'colourful' characters, with more money than acting sense, who seem to traipse around the Hamptons, with no evident day jobs, spending inordinate amounts of money on produce that always seems to be in season, and ridiculously creamy milk that only seems to be sold in glass bottles. How could I not pick up the book for a look inside that unrealistic lifestyle?

The book is very nice looking, and it's basically a mirror image of the TV show by the same name. If you've watched the program, then you've seen the recipes, and there's not much additional content worth mentioning. Still, I like Garten's approach -- it's straightforward and her ingredients and instructions are fairly ordinary and accessible.

I stopped on the recipe for Raisin Pecan Oatmeal Cookies, because the picture looked fabulous, and Garten proclaims it was her ultimate recipe find, after years of trying to perfect the ultimate oatmeal cookie. As I happened to have all the ingredients on hand (sometimes stocked cupboards can be a dangerous thing), I decided to give them a try.


Don't these pages beckon to you, too?


Start by toasting a cup and a half of pecans. I didn't even bother chopping them once they were done, I just broke them up with my fingers.


Creaming the butter and sugars together until light in colour and you can't feel any grains of sugar between your fingers.


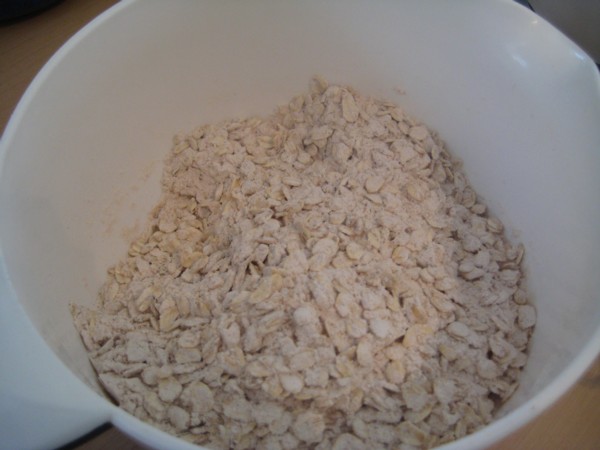
Mix up the dry ingredients and add to the wet.

Use a small scoop to form the cookies on the pan.


And here they are, cooling from the oven.


Yummy with a glass of iced coffee!

Raisin Pecan Oatmeal Cookies (recipe from Ina Garten's Barefoot Contessa: Back to Basics)

These make chewy, slightly salty cookies, full of raisins and toasted nuts.

1 1/2 cups pecans
1/2 pound (2 sticks) unsalted butter, at room temperature
1 cup dark brown sugar, lightly packed
1 cup granulated sugar
2 extra-large eggs, at room temperature
2 teaspoons pure vanilla extract
1 1/2 cups all-purpose flour
1 teaspoon baking powder
1 teaspoon ground cinnamon
1 teaspoon kosher salt
3 cups old-fashioned oatmeal
1 1/2 cups raisins

Directions

Preheat the oven to 350 degrees F.

Place the pecans on a sheet pan and bake for 5 minutes, until crisp. Set aside to cool. Chop very coarsely.

In the bowl of an electric mixer fitted with the paddle attachment, beat the butter, brown sugar, and granulated sugar together on medium-high speed until light and fluffy. With the mixer on low, add the eggs, one at a time, and the vanilla.

Sift the flour, baking powder, cinnamon, and salt together into a medium bowl. With the mixer on low, slowly add the dry ingredients to the butter mixture. Add the oats, raisins, and pecans and mix just until combined.

Using a small ice-cream scoop or a tablespoon, drop 2-inch mounds of dough onto sheet pans lined with parchment paper. Flatten slightly with a damp hand. Bake for 12 to 15 minutes, until lightly browned. Transfer the cookies to a baking rack and cool completely.

Tuesday, April 13, 2010

Pan co'Santi - Walnut Bread

Let me start off by saying that had I not pulled this lovely loaf from my very own oven, I’m not quite sure I would have believed I actually made it. In fact, I’m still not certain the whole experience wasn’t a fluke. The bread is that good, people.

Before I share the recipe, let me tell you a bit about it. If any of you are like me, and scour the internet for food-related articles, you’ll have no doubt heard about the revolutionary bread-making technique that was discovered several years ago and caused a bit of a sensation on the old Internet. Jim Lahey’s infamous no-knead bread garnered a lot of e-press from foodies, and after reading about it for months, I was curious to try it myself. I admit to being a bit sceptical about the process, not to mention wary of the removal of what can be the most therapeutic and satisfying part of the whole bread-making process.

Now I do not consider myself a bread-baking expert by any means. Over the years I have made a few loaves, but it’s not something I do regularly. One of the reasons is that I always feel I can buy a better loaf from a good bakery than I could ever produce at home. The loaves I have made have been tasty, and fill the house with an amazing smell as they bake, but the crust produced in a standard oven is always too soft for my liking. And my loaves often rose too high, then fell, resulting in a sad looking flat, defeated top.

So I was expecting similar lacklustre results with this bread. But boy was I wrong! This bread is unlike anything I’ve ever, ever made at home before. This bread is substantial and glorious, with a toothsome crust that crackles under your knife and gives way to your teeth. It looks rustically handmade, but impressively interesting at the same time. You know those loaves of artisanal bread you stumble over in French bakeries or farmers’ markets, for which you happily fork over $5, then rush home to cut off a slice to smear it with softly ripened cheese or chevre, or just plain old unsalted butter, sprinkled with a bit of sea salt? This is that loaf!! And you can make it yourself. It takes time, but the entire recipe is as easy as stirring together the dry ingredients, adding water and yeast and letting chemistry do its thing.

The next day, you have to do a bit of loaf forming, and another rise, but really, minimal effort is required. The secret, I think, is baking in a pre-heated cast iron pot in a ridiculously high oven. It produces a blast of heat that must crisp the crust almost immediately. The only negative thing I can say about the technique is that I couldn’t really smell the loaf as it baked, likely because the pot was literally smoking hot and it’s that I could smell rather than the bread itself (which could be a function of my retro oven). But that minor quibble is really just that, and what you’re left with is a fragrant loaf, studded with plump fruit, nuts and spices. It’s tasty as is, and even more delightful toasted up for breakfast the next morning. I opted for the cinnamon raisin variety for my first attempt, but now I’m eager to try just a plain white loaf, and whole wheat, into which I’d love to throw a bit of honey and some dried figs I picked up on the weekend.

Here's how it starts...

Combining dry ingredients. I used some pretty dried out rasisins I had lying around, and they plmuped up nicely during the long rise.

Wet ingredients added, resulting in a wet, sticky, blob.

And 18 hours later, you get this! It's like a science project on your kitchen counter. It rises again, this time in loaf form, then gets popped in the oven until you get.........


This! Amazing, right?

Even better sliced. Look at those beautiful slices.
So here's the timeline I used.
6 p.m. Assemble ingredients and leave dough to rise.
10 a.m. the next day. Prepare bread for second rise.
11:30 a.m. Put cast iron pot in oven to pre-heat.
Noon or so. Bake loaf
1 p.m. You'll have a fresh loaf of bread begging you to eat it!

Here’s how to create your own bread magic.

Pan co'Santi - Walnut Bread

recipe- The Revolutionary No-Work, No-Knead Method by Jim Lahey
Yield: One 10-inch round loaf; 1 1/2 pounds
Equipment: A 4 1/2- to 5 1/2-quart heavy pot
· 3 cups bread flour (I used all purpose and it seemed to work fine)
· 1/2 cup raisins
· 1 1/4 teaspoon table salt
· 3/4 teaspoon cinnamon
· 1/2 cup walnuts
· 1 1/2 cups water
· 1/2 teaspoon instant or active dry yeast
· pinch fresh ground pepper
· wheat bran, cornmeal or additional flour for dusting (I used cornmeal)
1. In a medium bowl, stir together the flour, raisins, walnuts, salt, cinnamon, yeast, and pepper, mixing thoroughly. Add the water and, using a wooden spoon or your hand, mix until you have a wet, sticky dough, about 30 seconds. If it’s not really sticky to the touch, mix in another tablespoon or two of water. Cover the bowl and let sit at room temperature until the surface is dotted with bubbles and the dough is more than doubled in size, 12 to 18 hours.
2. When the first rise is complete, generously dust a work surface with flour. Use a bowl scraper or rubber spatula to scrape the dough out of the bowl in one piece. Using lightly floured hands or a bowl scraper or spatula, lift the edges of the dough in toward the center. Nudge and tuck in the edges of the dough to make it round.
3. Place a tea towel on your work surface and generously dust it with wheat bran, cornmeal, or flour. Gently place the dough on the towel, seam side down. If the dough is tacky, dust the top lightly with wheat bran, cornmeal, or flour. Fold the ends of the tea towel loosely over the dough to cover it and place it in a warm, draft-free spot to rise for 1 to 2 hours. The dough is ready when it is almost doubled. If you gently poke it with your finger, it should hold the impression. If it springs back, let it rise for another 15 minutes.
4. Half an hour before the end of the second rise, preheat the oven to 475 degrees F, with a rack in the lower third, and place the covered 4 1/2 - to 5 1/2 -quart heavy pot in the center of the rack.
5. Using pot holders, carefully remove the preheated pot from the oven and uncover it. Unfold the tea towel and quickly but gently invert the dough into the pot, seam side up. Cover the pot and bake for 30 minutes.
6. Remove the lid and continue baking until bread is a deep chestnut color but not burnt, 15 to 30 minutes more (It took me about 15). Use a heatproof spatula or pot holders to gently lift the bread out of the pot and place it on a rack to cool thoroughly.

Sunday, April 4, 2010

Hot Cross Buns

Happy Easter! This has been one of the warmest weekends on record, with temperatures pushing 30 degrees here in the nation's capital. Today was a bit cooler, and tomorrow's calling for rain, but still, we're pretty lucky -- especially those of us fortunate enough to get a four-day weekend.

As much as I'm enjoying the nice weather, I think the plants outside are liking it more. I can practically see the leaves growing on my trees, and there are new snowdrops appearing almost by the minute.

So, what, you might ask, was I doing inside baking on such a gorgeous day?

Well, let me remind you that it was a bit cooler today, and I was up early, the buns don't take much time to make -- and hey, what's Easter without Hot Cross Buns anyway?

Now, I haven't always been a fan of these springtime buns. I think the dislike stems back to childhood, when I can remember being in Toronto and getting some buns from a bakery, biting into one, and finding a toothpick baked inside, which then got lodged into the roof of my mouth. Ouch, right? Between that scarring experience and years of medicore store-bought buns, it took a while to rekindle an affection for Hot Cross Bun.

But then I stumbled across the yummy and easy recipe from Donna Hay. Her version creates fragrant, soft buns that aren't too sweet and are sastifying to put together.

Here's how they start....


Mixing up the flour and spices. The recipe calls for mixed spice, so I threw in some nutmeg (1tsp), ground ginger, allspice, ground cardamon and a dask of ground cloves. This recipe really is a good excuse to delve into your spice rack and get creative.

Next comes the dried fruit. The recipe calls for sultanas and candied peel, the latter of which I didn't have. I used raisins, currants and some chopped dried apricot.

Here's the dough after kneading, all oiled up and ready for a rest.


And here it is about an hour later. I let it rise inside the microwave, into which I placed a mug of water, heated on high for one minute. With the door closed, it's a veritable steam bath for the mound of dough!


And here are the finished beauties, fresh out of the oven and drenched in glaze. I was a bit heavy handed with the old crosses, but I figure that makes me extra religious, right?

And here's the one I took from the batch. Can you see the juicy rasins and delicately spiced texture? How about the butter ever so slightly melting into the warmth? Apologies for the blurry photo, but I was in too much of a hurry to devour this.

Hot Cross Buns
From Modern Classics 2 by Donna Hay

2 tablespoons dried yeast*
¼ cup (55g) caster (superfine) sugar
1½ cups (375ml) warm milk
4¼ cups (635g) plain (all-purpose) flour
2 teaspoons mixed spice
2 teaspoons ground cinnamon
50g butter, melted
1 egg
¼ cup (55g) caster (superfine) sugar, extra
1½ cups (240g) sultanas
⅓ cup (55g) candied mixed peel, optional

Crosses
½ cup (75g) plain (all-purpose) flour
⅓ cup (80ml) water


Glaze
2 teaspoons sugar
1 teaspoon powdered gelatine
¼ cup (60ml) water
*this isn't the same recipe as in the book, but as the book makes too much glaze, I'd suggest using this one instead. I didn't have any powdered gelatine, so I used a leaf,

Combine the yeast, sugar and milk in a bowl. Set aside for 5-10 minutes or until bubbles form on the surface.

Combine the flour, mixed spice, cinnamon, butter, egg, extra sugar, sultanas, mixed peel and yeast mixture in a large bowl. Mix with a butter knife until a sticky dough forms. Knead on a lightly floured surface for 5–10 minutes or until it feels smooth and elastic when pressed. Place in an oiled bowl, cover with a tea towel and stand in a warm place for 30–40 minutes or until doubled in size.

Lightly knead the dough again, divide into 12 pieces and roll into balls. Place in a 23cm-square cake tin lined with non-stick baking paper. Cover with a clean tea towel and set aside in a warm place for 25–30 minutes or until doubled in size.

Preheat oven to 375ºF. To make the crosses, combine the flour and water to make a smooth paste. Place in a piping bag** and pipe crosses onto the buns. Bake for 30–35 minutes or until well browned and springy to touch.

To make the glaze, combine the sugar, gelatine and water in a saucepan over medium heat and stir for 2 minutes or until dissolved. Brush warm buns with the glaze and serve with butter. Makes 12.

* You will need this amount of yeast because of the amount of sugar in the recipe.
** To make a piping bag, fill a ziplock bag with the cross mixture and snip off one corner.