Tuesday, July 27, 2010

Cherry clafouti

I'm not sure if the news has reached you yet, but this has been one insanely hot summer so far. I'm feeling pretty happy with my decision to buy a house without air conditioning. Smart move there, Jackson!

Needless to say, with all the stiffling heat and humidity, I've nearly forgotten how to cook things that involved the stove or oven. But a recent break in the temperature meant that I could venture into the kitchen again, and depart from my usual routine of sticking my sweltering head inside the freezer for hours at a time. (Just kidding, Hydro Ottawa!)

The project that lured me back? Yummy, easy cherry clafouti. Actually, I first made the recipe with raspberries, but we made it twice with cherries at the cottage last week, and I made it again this week. It's so very good, and incredibly easy to whip together. Aside from the fruit, you're likely to have everything you need on hand.

Clafouti -- essentially a custard-like, pancake dessert -- is a peasant dish, originating in France. Who says fancy and complicated is better anyway? Like many of the best recipes derived from simple ingredients, it's delicious.

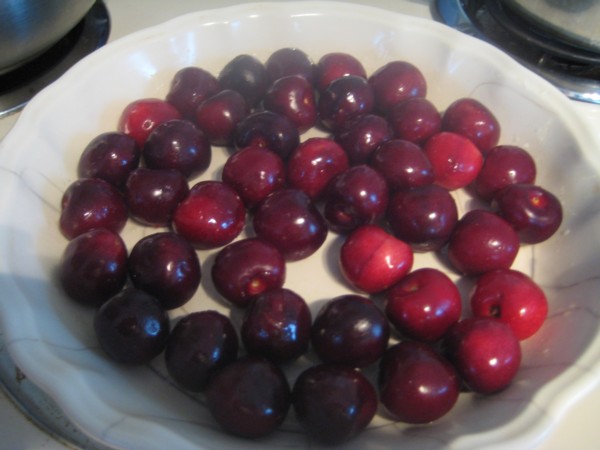
Start by melting the butter in your pie plate while your oven's heating up. When that's done, dump the butter in with the other ingredients and add your fruit. No need to even pit the cherries. Apparently, it's traditional to keep the pits in, as they release a better flavour to the fruit when baked. Not sure if that's true or not, but it sure makes things easier.

Next, pour the custardy batter over the fruit, and scatter with a bit more sugar (in this case, the turbanado sugar I bought at the Lakefield Pantry last weekend).

Into the oven it goes for about 20 minutes until it's puffed and golden and smells terrific! You can broil at the end to brown up the top if you like, but most of the time, I find it's not needed. Just look at how the fruit stays suspended in the fluffy goodness. And those burnt bits at the edge? They're begging for you to nibble at while the whole thing cools.

I think you'll really, really like this recipe. It's not too sweet, and when you pull out the softened cherries to eat, you're left with little dimples of custardy goodness.

You can eat this warm, at room temperature, or even cold. It's good with a scoop of ice cream, or just fine on its own. Makes a mighty fine breakfast as well. Dig in!

Cherry clafouti (adapted from Martha Stewart's baked raspberry custard dessert)

Serves 6

1/4 cup (1/2 stick) unsalted butter
3/4 cup whole milk
3 large eggs
1/2 cup plus 1 tablespoon sugar
1/2 cup all-purpose flour
1/4 teaspoon coarse salt
1/2 teaspoon pure vanilla extract
2 cups cherries (or any other fruit you fancy, like raspberries or plums)

Directions

•Preheat oven to 400 degrees. In oven, melt butter in a 9-inch pie plate, about 6 minutes.

•In a blender, combine milk, eggs, 1/2 cup sugar, flour, salt, and vanilla. Add melted butter and blend mixture until smooth, 30 seconds.

•Distribute cherries evenly in pie plate and pour batter over top. Sprinkle with 1 tablespoon sugar and bake until slightly puffed and just set in middle, 20 to 25 minutes. Heat broiler and broil until top is deep golden brown, 2 to 3 minutes. Serve warm.

Sunday, July 11, 2010

Swiss chard and scapes

It's so nice to see so many green things springing up at the market each week. Of course, thanks to this bloody heatwave, the veggies may be tempting, but the thought of actually cooking them is terrifying. Turning on the stove? Risky decision at best! Turning on the oven? Completely unthinkable, my friends.

Luckily, last weekend was bearable, temperature wise, so I was able to enjoy the rainbow chard I picked up at the Main Street market. I've only started eating chard in the last few years and I have to say, I absolutely love it. To me, chard is in that same category of beet tops and kale: greens full of irony goodness. This is the first time I've tried rainbow chard, and the bunch I bought had leaves that were completely free of earwig holes. (How is that even possible with the summer we're having?)

I can't say the rainbow variety tastes any different from the regular Swiss variety, but the colours sure are pretty.

I also picked up the last of the season's garlic scapes, so I decided to combine the two into the same dish. Normally, I'd saute a few cloves of garlic in a bit of olive oil before adding the chard, but no need with the scapes.

Next go the chard stalks, chopped into manageable pieces. Saute until soft.

Then come the leaves, washed and torn.


And cook until the leaves are wilted. Then add some salt and pepper and a bit of lemon juice.

Enjoy!

Monday, July 5, 2010

Brazilian "lemonade"

So, are you crushed that Brazil's now out of World Cup contention? Yeah, me either. I kinda lost interest in the whole tournament the moment I heard David Beckham had injured his Achilles' tendon and would have to sit around on England's sidelines modelling fancy suits and looking fine.

Speaking of yummy, here's a tasty summer drink to cool you down and drown your Brazilian sorrrows. I have no idea if they actually make it in Brazil, but with only four ingredients, who cares? It's easy and tasty to boot.

Start by quartering your limes. Thanks, Farm Boy, and your eight limes for 99 cents sale!

Then measure out your three tablespoons of condensed milk. Go ahead and lick the spoon after as well. You know you want to.

Blend and blend until you're left with this pulpy, frothy mess. Then strain it all through a sieve and add some extra water to wash all the sugar off the limes.


And you're left with this limey, creamy drink. It's great on its own, poured over ice, but would also be good with some run, or tonic thrown in. Enjoy in your backyard (and ignore the earwigs -- I do!)


Brazilian Lemonade
(recipe Sunset Magazine)

3 limes, quartered
1/3 cup sugar
3 tablespoons sweetened condensed milk

Place all the ingredients in a blender. Add 4 cups cold water and blend on high speed until limes are slightly chopped. Strain into a pitcher and then, with the strainer still resting above the pitcher, slowly pour about 1 more cup water (depending on how sweet you want the drink) through the strainer over the lime pieces to extract all the residual sugar and juice.

*You may need to add a bit more sugar at the end, depending on how bitter your lime rinds are.

Thursday, July 1, 2010

Strawberries for Canada Day!

Thought I should post something red in honour of Canada Day today. Look at these beauties! Such a nice change from the monstrous California berries that we see all year round. Local strawbs are definitely work seeking out. So good!

Happy Canada Day!


Fig bars

I've had this recipe in my stack for a while now, and have been meaning to give it a try ever since I picked up a bag of dried figs from the Mid-East Food Market. (Quick aside: if you sign up to receive recipies from Martha Stewart she'll soon become your BFF by e-mail and swamp your inbox with all sorts of mail about food, crafting and organizing tips. It's a friendly reminder, several times a day, of how imperfect you are! Good times!)

I wanted to make it partially for my dad, who is a fan of figs. I thought they would turn out to be kind of like date squares, though I not really sure why. There are no oats in the recipe, and while dates and figs are somewhat similar, the bars really bear no resemblance to each other.

But they did give me a good excuse to pull out my new-to-me food processor (thanks Mrs. H!).

Here's how they start....

Pulse the butter, flour and sugar together for the crust.

Then pat the mixture down in the pan. Don't worry, the fingerprints will disappear once the filling goes in.


Then add the dried figs back to the processor -- no need to clean in between!


Once the fruit is combined with the juice and lemons, you add it to the filling. Kinda looks like olive tapenade, doesn't it?

Then the remaining mixture goes on top. I ended up with some pretty big clumps here, as my topping didn't seem to want to hold together.

Here's what it looked like after baking.


And these are the finished products! Overall rating is okay, but not stellar. I do have to say that the squares lasted quite a while, and cut well too, so bonus points for that I suppose. If you have some dried figs lying around, give these a try, but I wouldn't suggest you run out and buy some just for this recipe. Now to find something else to do with the remaining figs in my pantry!

Fig Crumble Bars (from Everyday Food)

Ingredients
Makes 20

3/4 cup (1 1/2 sticks) cold unsalted butter, cut into pieces, plus more for pan
2 cups plus 2 tablespoons all-purpose flour, spooned and leveled
1 cup plus 2 tablespoons sugar
8 ounces dried Calimyrna figs (about 1 1/2 cups), stems removed
3/4 cup apple juice
1 teaspoon grated lemon zest

Directions

1.Preheat oven to 375 degrees. Butter an 8-inch square baking pan; line bottom and two sides with a strip of parchment paper, leaving a 2-inch overhang. Butter paper; set pan aside.

2.In a food processor, pulse together 2 cups flour and 1 cup sugar. Add butter; pulse until mixture resembles coarse meal. Transfer half of mixture to prepared pan; with lightly floured fingers, press firmly into bottom. Set aside. Shape remaining mixture into large, moist clumps; transfer topping to a bowl, and set aside. Wipe food processor bowl clean.

3.Make filling: In food processor, blend figs, apple juice, lemon zest, and remaining 2 tablespoons each flour and sugar until a thick paste forms.

4.Using a small offset spatula or table knife, spread filling over crust. Sprinkle with topping. Bake until topping is golden brown, 60 to 65 minutes.

5.Transfer pan to a wire rack; let cool completely. Using paper overhang, lift crumble from pan, and transfer to a cutting board; cut into 20 bars. Store in an airtight container at room temperature up to 5 days.